Quickstart
You can make many types of HTTP requests using Aircampi API. You can make requests to view, create, update, or delete records. But first, send a simple HTTP request to know the Aircampi Auth's health.
Step 1: Consider before you start
Review the basics. If you're new to REST APIs, make sure you understand the basics of REST and JSON, and scan our list of important terms.
Review opt-in requirements. Some resources or their attributes might be associated with features that require opt-in before you can use them. Make sure to enable these opt-in features before you start.
Choose a client software. REST APIs connect software programs over the HTTP protocol. You need a software to send the HTTP requests. The examples on these pages use cURL. But, cURL isn't the only tool you can use. To help you choose one, see Work with your REST API Client.
Step 2: Get your Aircampi Account
Go to Aircampi Console and click the Sign Up in the top navigation header. Choose an option to sign up like email, github,... and follow up to complete.
Now, you have an account for Aircampi.
Step 3: Create your first project
After signed to Aircampi Console in, click the Create Project button in the top navigation header or on the Create Project button on your console homepage. Choose a name for your project and click create to get started.
To make a HTTP request, you need to gather a few bits of information:
- Project URL. Typically, the URL of your project URL. For example, https://your-project-url.aircampi.com.
- Client Identitier and Client Secret.
- Access Token. A Token with permissions to access the resources you're using.
Step 4: Configure a client software.
With the information gathered so far, you're ready to configure your client to send a REST HTTP request.
- Construct the request URL. The URL consists of the project URL, stack URL and stack version, like this: https://{project_url}.aircampi.com/{stack_url}/{version}/, where project URL is the REST API URL from Step 3, for example, https://your-project-url.aircampi.com.
Stack URL is the relative path or endpoint to the resource you're working with. You can pick any endpoint from the list on All REST Endpoints. For example, if you're interested in the auth health, the resource path is /auth/0.1.0/health. However, some resources or their attributes might be associated with features that require opt-in before you can use them.
Combine the project URL, stack URL, and resource path, and your request URL is complete. In this example, it is https://{project_url}.aircampi.com/{stack_url}/{version}/{resource}. For more information, see Resource Paths.
Provide your authorization information. For example, if you are using cURL, you can specify your authorization information using the
-HcURL command as follows:-H "Authorization: Bearer {token}"Set the media type. Media type defines the structure of the HTTP payloads exchanged between the server and the client. For example, if you're using cURL, you can specify a resource item media type using the header
-Hcommand as follows:-H "Accept: application/json"
For more on media types, see Supported Media Types.
When you're done, the complete cURL command should look like this:
curl https://{project_url}.aircampi.com/auth/health
   -H "Accept: application/json"
   -H "Authorization: Bearer {token}"
If you're not familiar with any of the syntax used in the example, see Work with your REST API Client.
If you're an advanced REST user, but are reading this page anyway, you might want to set the REST Framework or configure Cross-Origin Resource Sharing (CORS) now.
Step 5: Send an HTTP Request
You're almost done. Now that your authentication and authorization are set, you're ready to send a test HTTP request. This example shows you how to get a health of Aircampi Auth through REST.
in cURL:
curl https://{project_url}.aircampi.com/auth/health
   -H "Accept: application/json"
   -H "Authorization: Bearer {token}"
in Postman
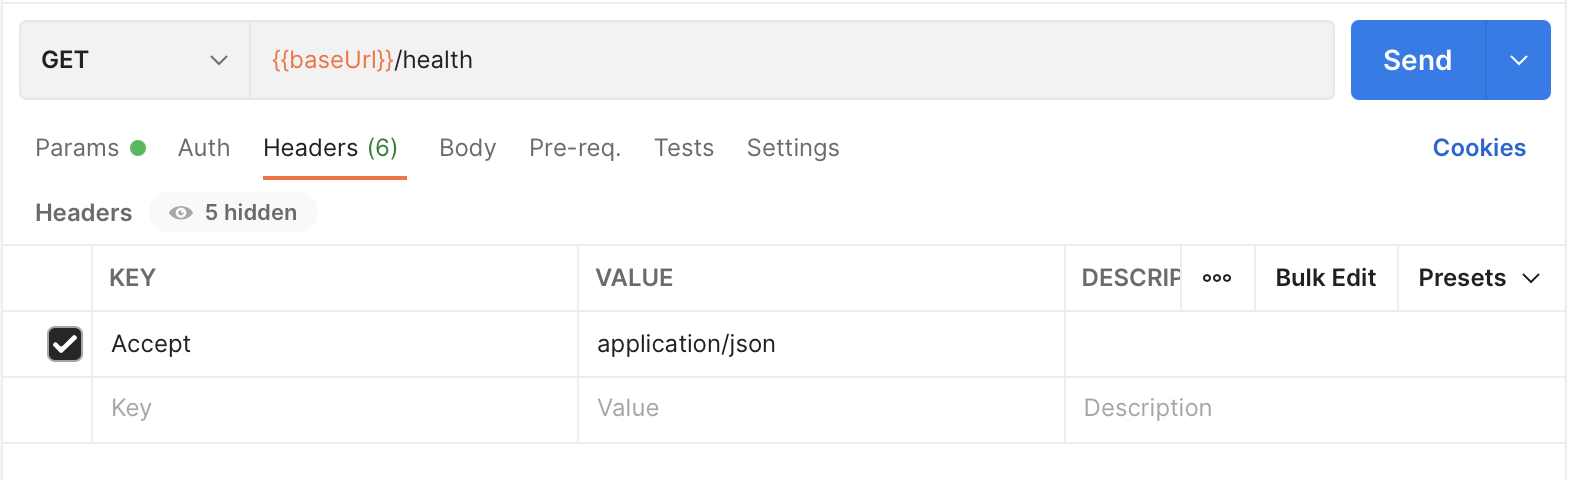
If your request for information about the Health is successful, you receive a response with a body similar to the following abbreviated example.
{
    "server_name": "Aircampi Auth",
    "server_version": "0.1.0",
    "server_status": "Active",
    "server_description": "Identity and access management provides control over user validation and resource access."
}
In a client, such as Postman, the results are formatted and displayed in the Response section. For example, with Postman, you can view the output in multiple formats. The following screenshot shows the response in JSON.
If your request fails, and you're using cURL, review the response comments, modify your request, and try again. If you're using other client softwares, see the failure Status Codes, and try again.
Now you're ready to do more with the Aircampi API.